
Homeowner guide · Dry rot by part of the house
Dry rot by part of the house
Where wood damage usually starts on a home, what the early signs look like at each spot, and a checklist you can print and walk before the rainy season.
Dry rot starts with water
“Dry rot” is the everyday name for wood decay. Despite the name, decay fungi only grow in wood that stays wet. By the time a board looks dry and crumbly, it has usually been wetted again and again, often from a source just above or beside it.
That is why it helps to look by part of the house. Each part has its own water path and its own early signs. A walk around the outside before the rains, while the wood is dry and easy to see, is the simplest way to catch a change early.
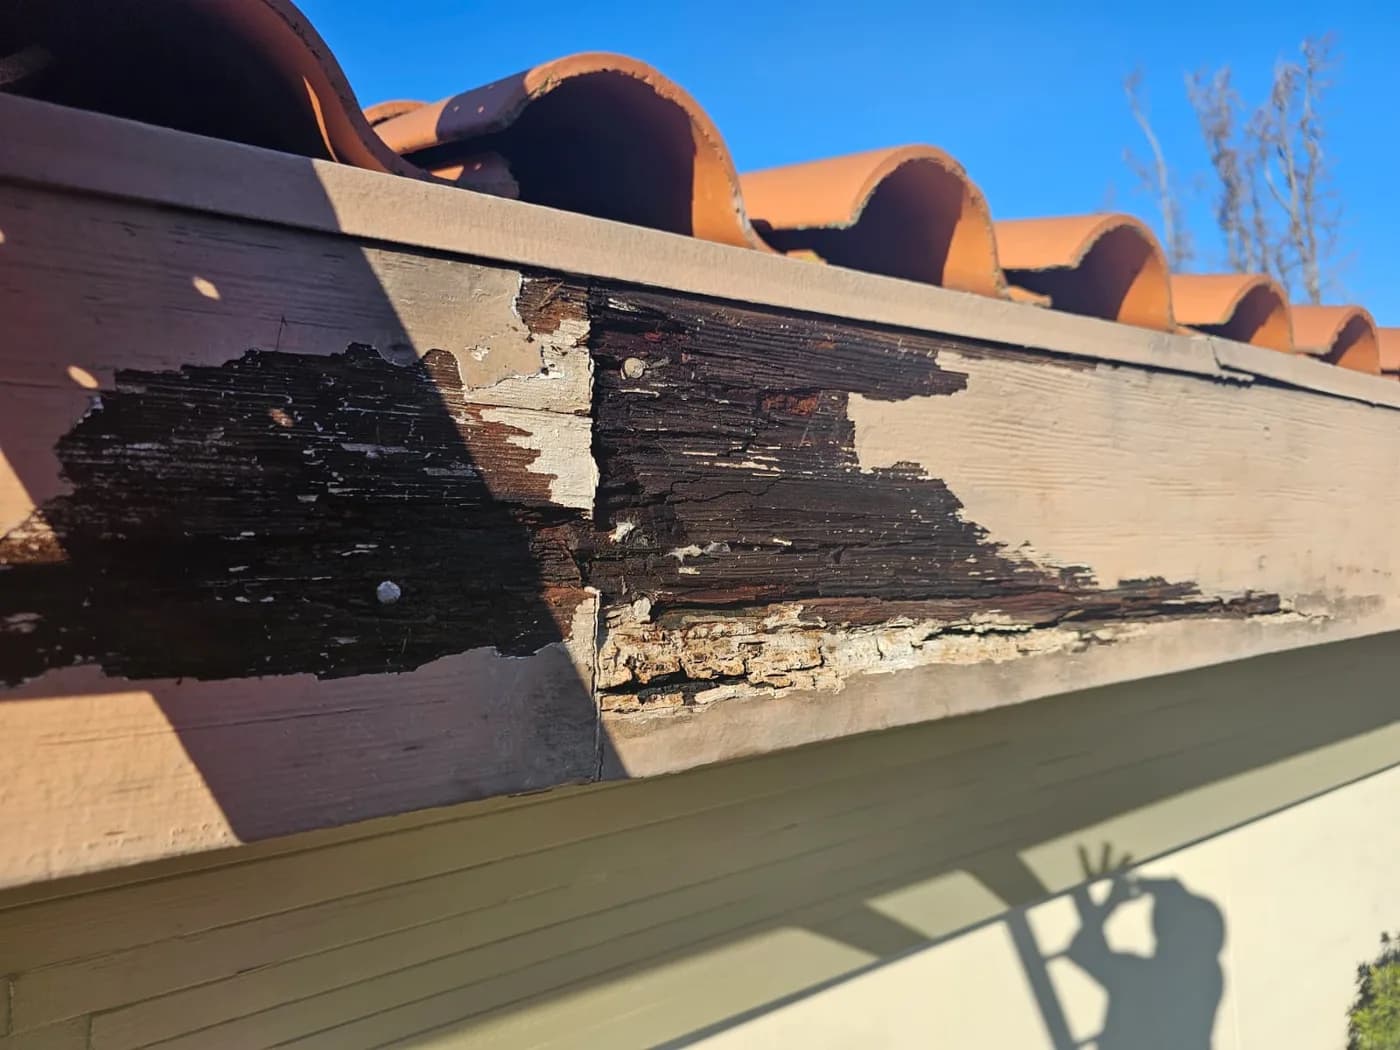
Fascia, eaves and soffits
The fascia is the board along the roof edge that the gutter usually hangs from. When a gutter overflows, leaks at a seam or pulls away, water runs down the face and over the bottom edge of that board again and again.
Where to look
- The lower edge of the fascia, especially below gutter seams, corners and downspout outlets
- Corners where two fascia boards meet
- The soffit (the underside of the eave) next to the fascia
- Gutters that sag, overflow in a storm or pull away from the board
Early signs
- Paint peeling or blistering in a band along the board
- Dark, stained or weathered wood showing through the finish
- Open or crumbling corner joints
- Stains or sagging on the soffit below
Safety: Look from the ground, with binoculars or a phone zoom if needed. Do not climb a ladder or walk the roof for this check.
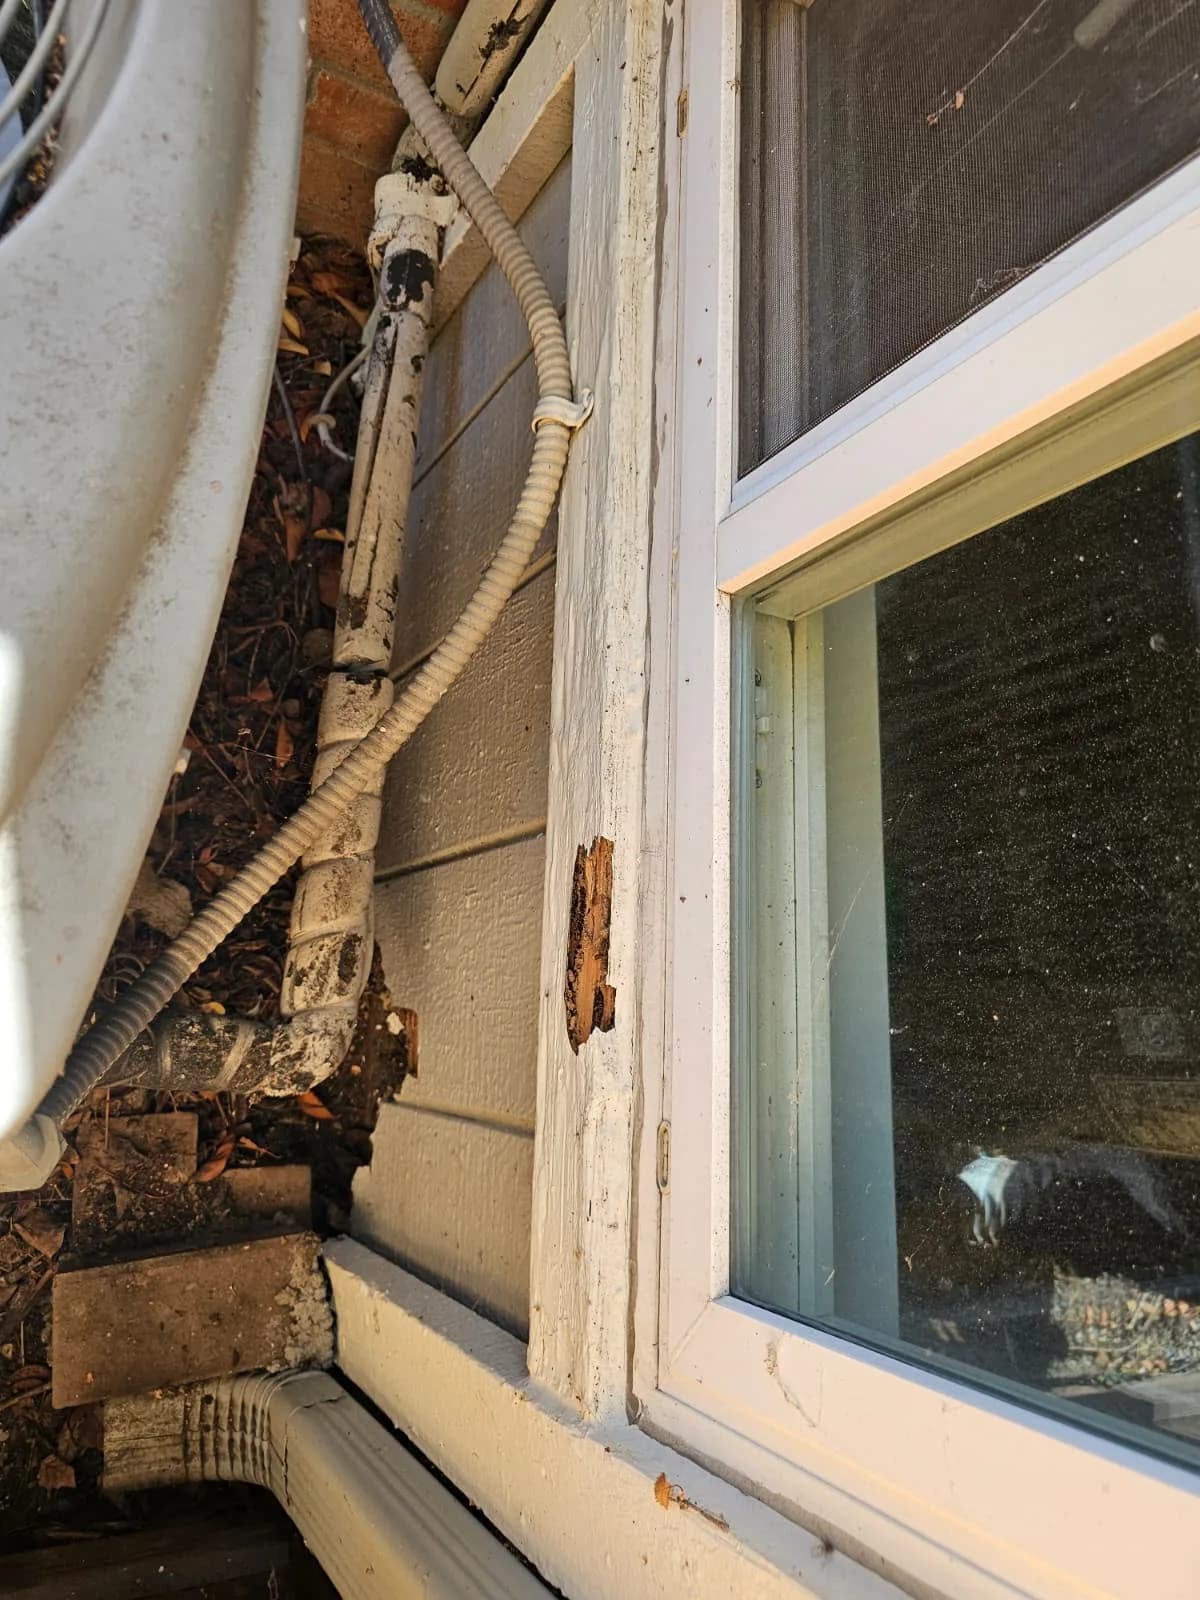
Window sills and trim
A sill is a flat surface that catches rain and runoff from the glass above it. Water that sits on the sill, or gets behind cracked paint and caulk, tends to show up first at the lower corners of the opening.
Where to look
- The top and front edge of each exterior sill
- The lower ends of the side trim, where they sit on the sill
- Joints between the sill, trim and siding
- The wall surface just below the window
Early signs
- Paint that cracks, lifts or keeps failing in the same spot
- Gaps where caulk has split or pulled away
- Wood that looks swollen, split or broken at a corner
- Staining that runs down the wall under the sill
Safety: Check ground-floor windows from outside. For upper windows, look from inside or from the ground; do not lean out or use a ladder.
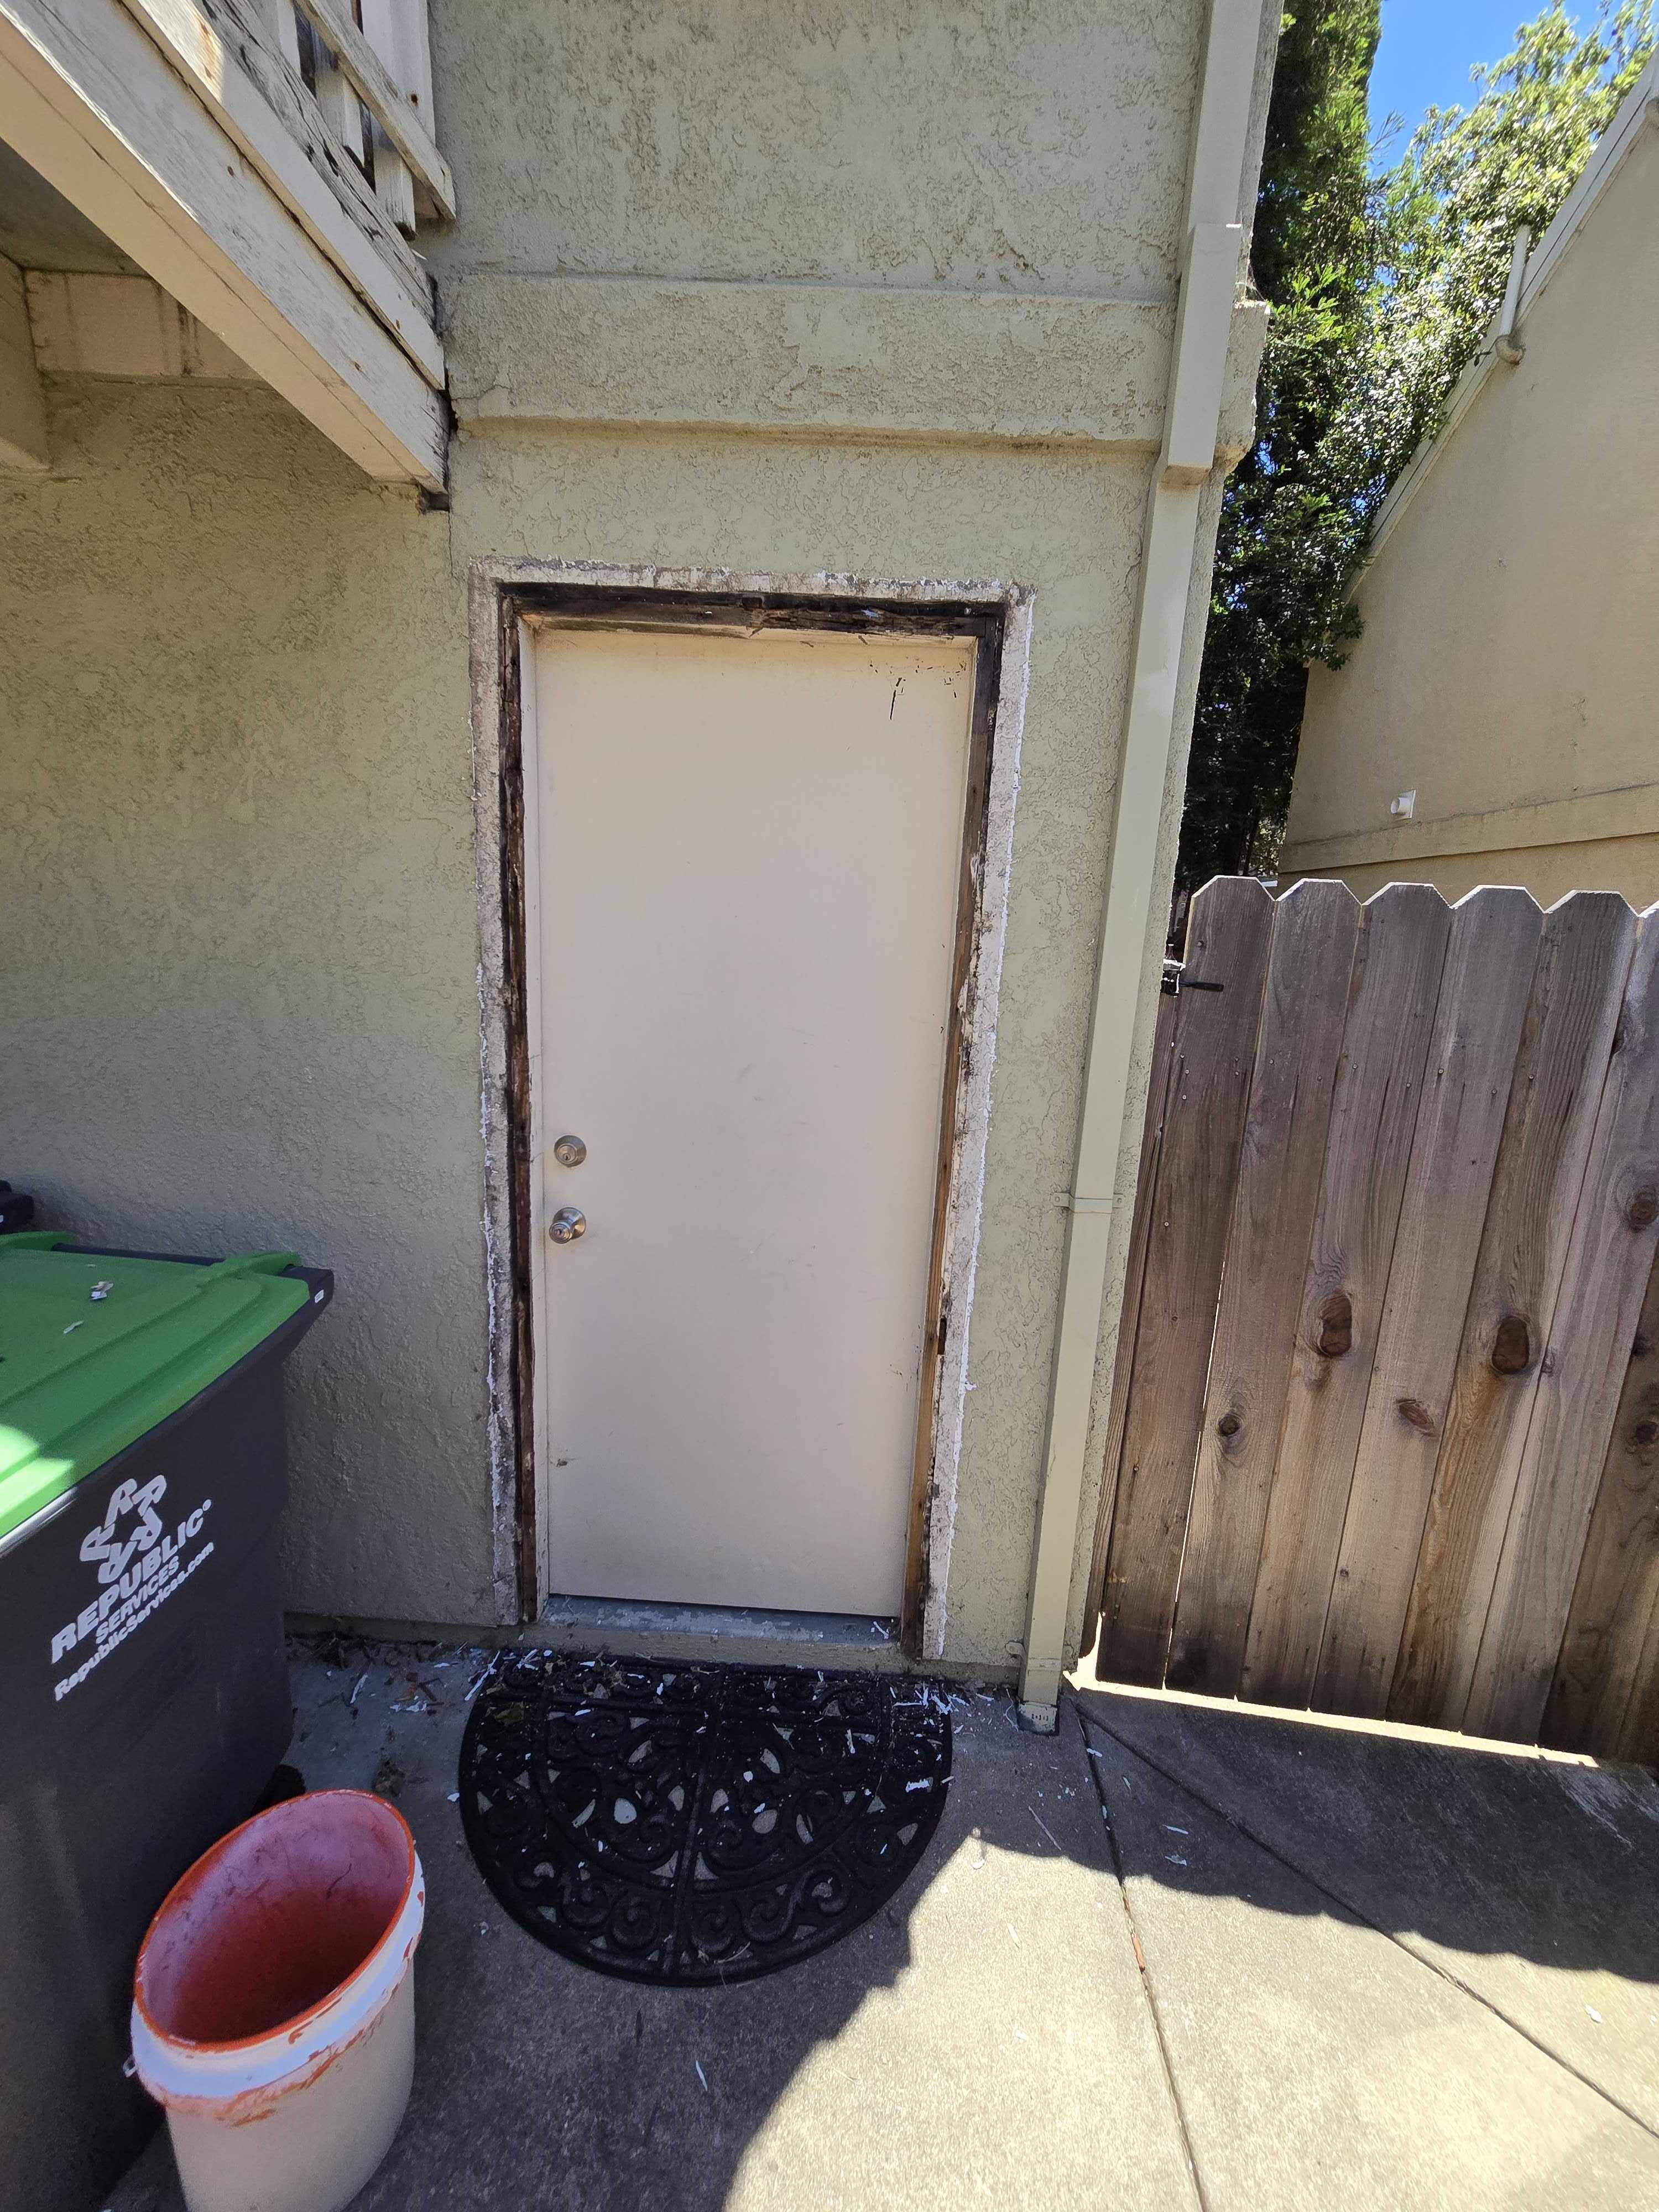
Door frames and thresholds
Exterior doors sit low, close to rain splash, puddles and runoff from the wall above. The bottom of the frame and the threshold take the most water, and the damage is often hidden behind paint until it is advanced.
Where to look
- The bottom few inches of each side of the door frame and its exterior trim
- The threshold and the floor or step right outside it
- Any overhang or gutter above the door that drips onto it
- Patio and sliding door surrounds, not just the front door
Early signs
- Dark or peeling paint at the foot of the frame
- Trim that has separated from the wall or the frame
- A door that has started to drag, stick or not latch
- Gaps, swelling or soft-looking wood at the threshold
Safety: Do not force a sticking door or pull trim away to look behind it. Photograph the whole door first, then the lower corners.
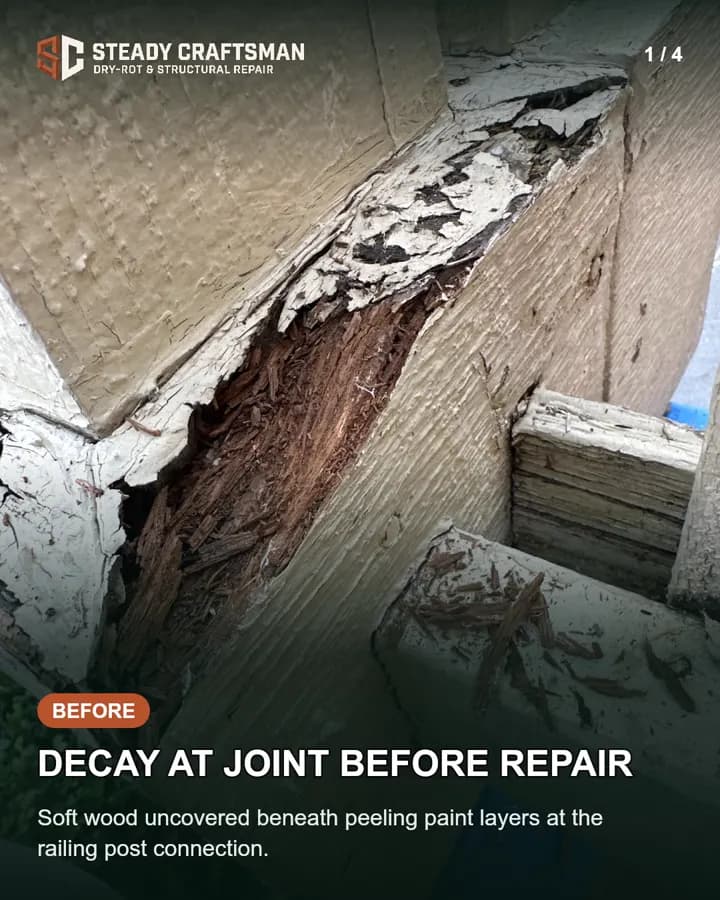
Decks, porches and railings
Decks and porches are open to the weather on every side. Board ends, joints and the places where pieces overlap stay wet longest, and so do connections that you cannot see from the top.
Where to look
- Board ends, and boards next to the house wall
- The base of each railing post and the joints where rails meet posts
- Stair treads and the stringers that carry them
- The flat top of a handrail, where water can sit
Early signs
- A rail, post, step or board that moves when it did not before
- Cracked or peeling paint over a joint, with darker wood underneath
- Splits, crumbling edges or fasteners sitting in dark, stained wood
- Boards that look sunken, cupped or uneven
Safety: Keep people off any deck, stair or railing that moves, sags or looks damaged at a connection. Do not lean on or load-test it to check.
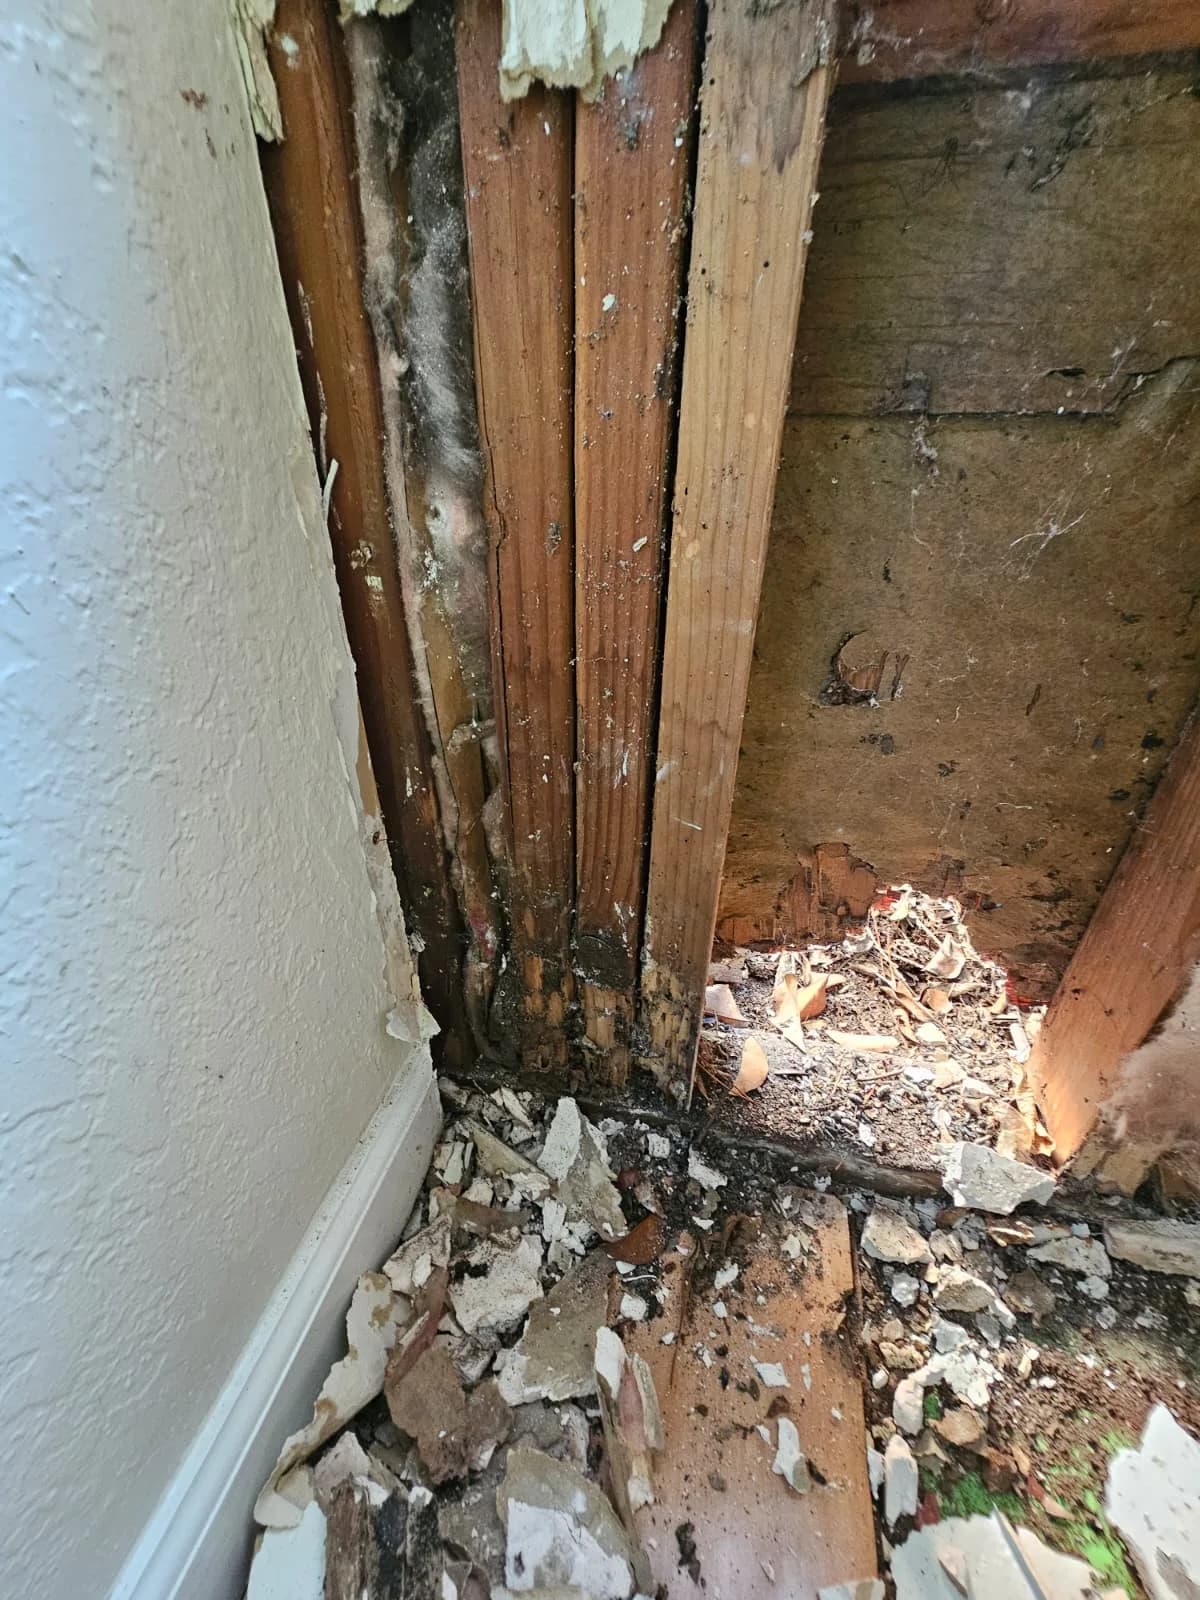
Siding and wall base
The lowest rows of siding sit close to the ground, where rain splashes back up, sprinklers spray and soil or mulch can build up against the wall. Damage there can continue behind the boards where you cannot see it.
Where to look
- The bottom row or two of siding along each wall
- Corner boards and the places where siding meets door or window trim
- Walls near hose bibs, sprinkler heads and downspout outlets
- Spots where soil, mulch or paving touches or sits close to the siding
Early signs
- Paint failing along the lowest boards only
- Boards that look swollen, split or broken at the ends
- Open gaps where siding meets trim
- Staining or dark patches that return after rain or watering
Safety: Look and photograph only. Do not pry boards off, dig at the wall or spray water at it to test.
Posts and columns
Porch posts, columns and carport or pergola posts often stand on concrete or a pier. Water collects at the base, and the end grain at the bottom of a post soaks it up. Hollow or wrapped columns can hide damage inside.
Where to look
- The bottom of each post or column, where it meets concrete, a step or a pier
- Base trim or wraps around the foot of a column
- The top, where the post meets the beam it supports
- Any post that sits in a spot where water pools
Early signs
- Peeling paint, staining or splits at the foot of the post
- Base trim that is loose, bulging or broken
- A gap between the post and its base, or a post that looks out of line
- A roof, beam or deck above that has started to sag
Safety: A post may be holding up a roof, beam or deck. If it moves, leans or the structure above it sags, keep people out from under and off that area and call promptly.
Garage door jambs and trim
The wood jambs and trim on each side of a garage door reach down to the driveway. Rain running off the door, splash from the driveway and water carried in on a car all meet at the bottom of those boards.
Where to look
- The bottom foot or so of each jamb and the trim beside it
- Where the door's weather seal or stop meets the jamb
- The header trim above the door, below any gutter or overhang
- The joint where the jamb meets the driveway or slab
Early signs
- Paint peeling or wood darkening at the bottom of the jambs
- Ends that look broken, swollen or crumbling
- Trim pulling away from the wall
- Stop molding that is loose or no longer sits straight
Safety: Keep hands and tools away from garage door springs, cables and tracks. Those parts belong with a garage door specialist.
Printable · Walk it from the ground
Pre-rain dry rot checklist
Check each item on a dry day. Anything you cannot tick, or cannot check safely, is worth a photo and a call.
Address: ______________________________ Date checked: ______________
Water path (from the ground)
Fascia, eaves and soffits
Window sills and trim
Door frames and thresholds
Decks, porches and railings
Siding and wall base
Posts and columns
Garage door jambs
Record it
Notes: what changed, where, and when you first saw it
Found something? Call Steady Craftsman before the rains.
- Stockton: (209) 299-1465
- Bay Area: (650) 336-2322
- San Francisco: (650) 336-2322
steadycraftsman.com/learn/dry-rot-by-part-of-the-house
Safety notes
- Stay on the ground. Roof edges, upper windows and high trim can be checked from the ground or from inside.
- Look and photograph. Prying, probing or pulling trim can make damage worse and cannot show how far it goes.
- Keep people off any deck, stair, railing or porch area that moves, sags or looks damaged at a connection.
- Stay clear of water near outlets, lights or wiring, and contact the appropriate qualified professional.
- Mud tubes, wood dust, holes or wings can point to insects, and fuzzy growth or a musty smell can point to mold. Those questions belong with the appropriate specialist.
When to call
- Wood that looks soft, crumbling, swollen or broken anywhere on the outside of the house.
- Paint that keeps failing in the same spot, or a stain that comes back after rain.
- A railing, step, deck board or post that moves, or a door that suddenly drags. Keep people clear and call promptly.
- Before you paint or caulk over wood you are unsure about, so the damage is not sealed in.
- Any item on the checklist above that you could not check safely from the ground.
A photo starts the conversation, but it cannot show how far damage goes behind paint or trim. The repair scope is confirmed in person, after the water source is understood.
General homeowner information, not an inspection or a diagnosis of any property. The decay principles follow the USDA Forest Products Laboratory’s Wood Handbook chapter on biodeterioration.