
Bay Area service guide · 05
Porch railing repair in the Bay Area
From the first damaged joint to the final finish.
See how a real porch railing project progressed, and what to expect if your own railing has deteriorated wood, a loose connection or failing paint. A site-specific assessment sets the repair scope.
Request a scope review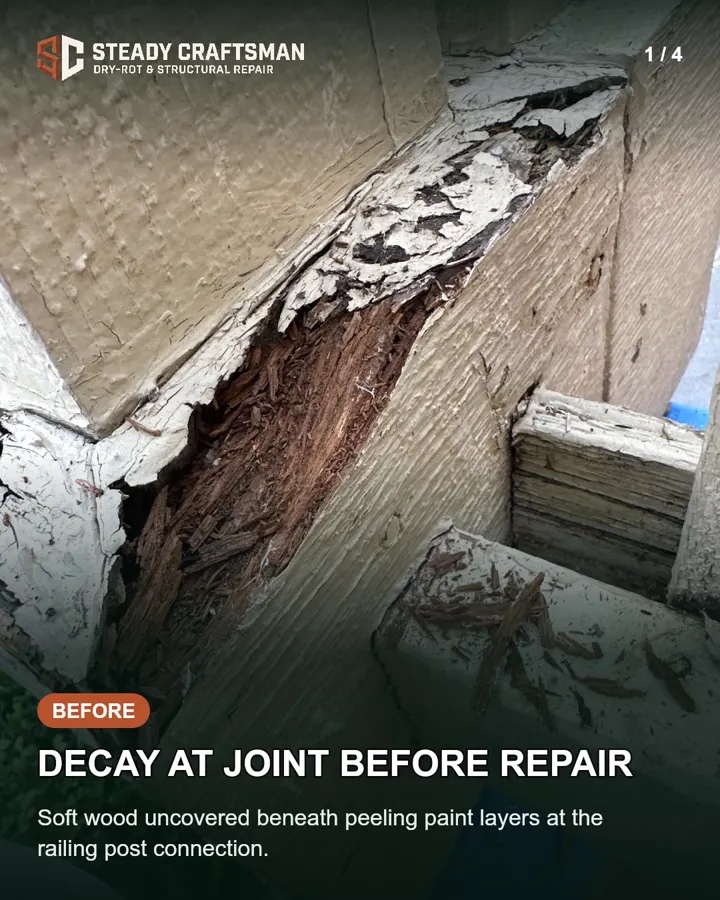
Before a repair is scoped
Start with what you can see.
Paint failure can be a surface issue or a sign of damaged wood beneath it. In the documented project, deterioration was visible at a railing joint. Your own railing needs its own inspection.
- 01Lifted or cracked paint at a post or rail connection.
- 02Soft, split or crumbling wood visible without probing.
- 03A rail or post that moves during ordinary use.
- 04Staining or recurring moisture near a joint.
What a scope review covers
- Where the affected rail meets posts, steps or adjacent wood.
- Safe access and any immediate use restriction.
- Whether a targeted repair or a wider rebuild is appropriate.
- Material matching, finish, hidden-condition and permit questions.
Photos to prepare
Take one overview and one close-up from safe ground. Include the affected side, access route and any known water history. Do not remove material or stress the railing for a photo.
Safety and scope first
If a railing, step or walking surface may be unsafe, keep people away. These photos document a visible project result, not concealed structural conditions or a code-compliance certification. Trade, permit and eligibility questions are confirmed for the actual property before work is accepted.
The repair sequence
From discovery to finished railing.
Each stage separates what the supplied project actually shows from what a homeowner should expect when planning a similar repair.
- 01
Identify the visible problem
In this project: In this project, the painted connection showed deteriorated wood and failed finish at the joint.
For your repair: Describe where the change appears, whether a post or rail moves during normal use, and when you first noticed it. Do not push or load-test a suspect rail. Send overview and detail photos only from a safe position.
Steady Craftsman project photo · stage 1 - 02
Assess the assembly and agree on scope
In this project: The project footage moves from the damaged joint to a review of the affected railing before removal. It does not reveal every concealed connection.
For your repair: An on-site assessment should identify affected posts, rails, adjoining wood, access, material profile and any permit or specialist question. Review the written repair scope and what will happen if opening exposes additional damage before work starts.
- 03
Protect the area and remove damaged pieces
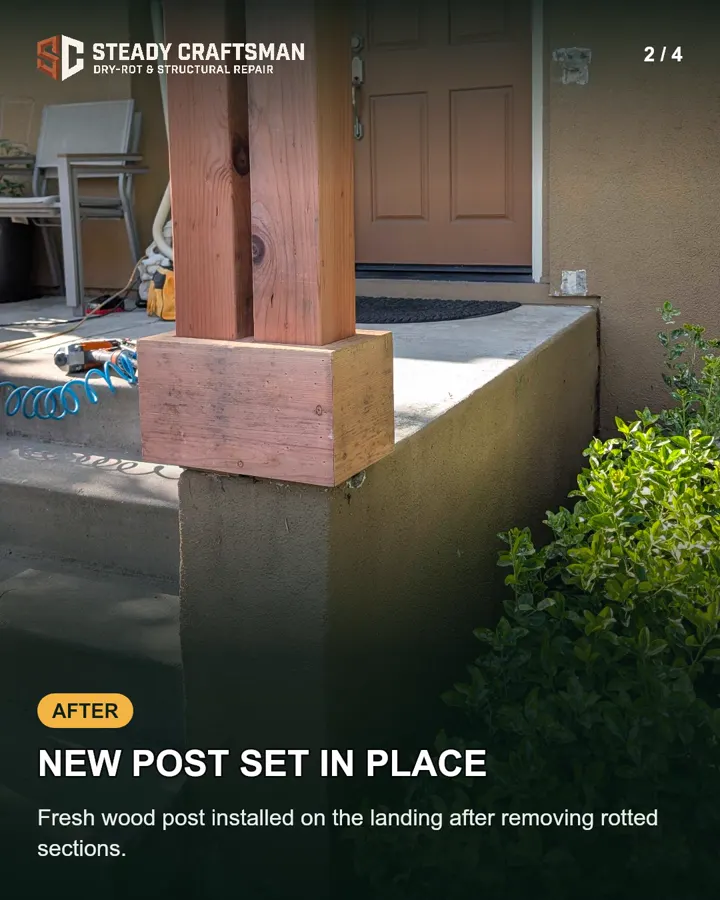
In this project: The old railing was removed with hand tools; the supplied sequence then shows a replacement post beside the steps.
For your repair: Confirm a safe work zone, access and protection for the steps and adjacent surfaces. Removal exposes connection details that photos cannot settle in advance. If more damage appears, pause for a revised scope rather than concealing it.
- 04
Fit new posts and rebuild the railing
In this project: New wood posts and rail framing were fitted along the porch run in the documented work.
For your repair: The exact materials, attachment method, dimensions and any required specialist or permit review depend on the actual property. The work should follow the agreed scope, with visible progress available to review before finishing.
Steady Craftsman project photo · stage 4 - 05
Mask, prepare and finish the woodwork
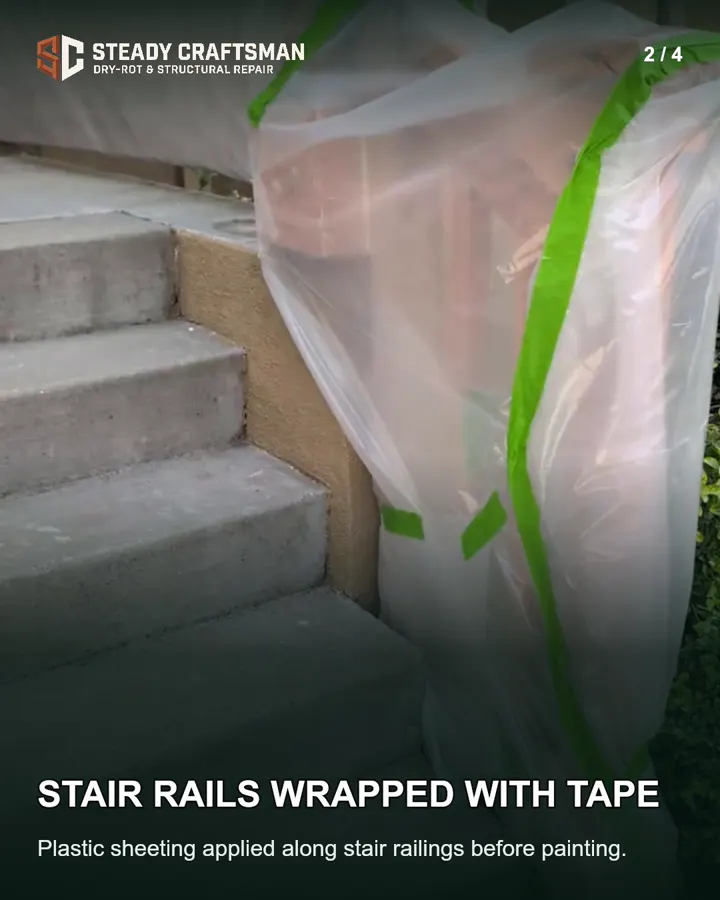
In this project: Plastic and tape protected the steps, nearby surfaces and landscaping before the finish coat.
For your repair: Clarify the finish color, material compatibility, surface preparation and what adjacent areas need protection. Weather and drying conditions can affect the finish sequence; any schedule is agreed for the specific job.
Steady Craftsman project photo · stage 5 - 06
Review the completed work
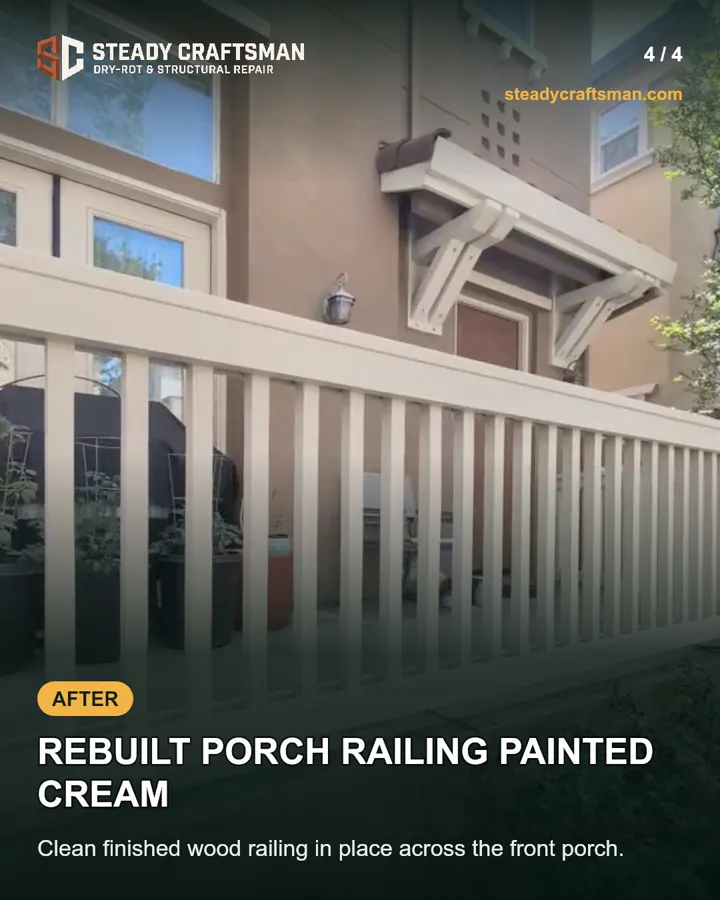
In this project: The supplied photos and video show a continuous cream-painted finish across the rebuilt railing, posts and balusters.
For your repair: Walk the visible result against the agreed scope, discuss any remaining items and care instructions, and keep the final record. A finished photo alone cannot certify concealed structure or regulatory compliance.
Steady Craftsman project photo · stage 6
Planning your project
What to expect before, during and after.
Start with the property location, safe photos and the specific rail or post that concerns you. Coverage, scope, access and current availability are confirmed before a visit is agreed.
After assessment, review the written work and material plan. If removal exposes additional damage, expect a scope discussion before extra work. Timing, site protection, finish and final walkthrough should be agreed for your property rather than assumed from this example.
Describe your porch railing concernQuestions worth asking
- What remains in place and what will be removed?
- How are adjacent steps, landscaping and finishes protected?
- Who reviews hidden conditions or specialist needs?
- What finish and final checks are included in the written scope?
Customer success story · documented project
A deteriorated joint became finished woodwork.
The homeowner’s railing showed visibly deteriorated wood beneath the painted surface. The supplied record follows removal of the old rail, new post and rail framing, masking and a completed cream-painted finish. It is a project narrative, not a customer quote or satisfaction claim.
See the whole visual story.
Four project-stage photos and the 99-second walkthrough are on the dedicated gallery page.
Open the project galleryCommon questions
Before you plan the repair.
What if damage extends beyond the rail?
Opening the affected area can reveal conditions that photos cannot show. Any added post, stair, support or moisture-source work needs an assessment and a revised scope before it is performed.
Can I keep using a loose porch railing until the visit?
Do not lean on, load-test or use a suspect railing, step or walking surface. Keep people away from the affected area and describe the access limitation when you request a review.
Will my repair follow these exact six steps?
These stages combine what the documented project shows with a proposed customer-planning sequence. Your materials, access, permit or specialist requirements, finish and timing are determined for the actual property and written scope.
Can you quote the repair from pictures?
Pictures help frame the conversation but cannot establish hidden damage, structural condition or all cost drivers. A written estimate follows review of the property, access, materials and agreed scope.
Ready to look at your Bay Area repair?
Talk it through with Bat and Joe. Describe what you are seeing, where the property is and when it started; the scope is confirmed on site, not from a photo.
Before your Bay Area scope review
Read the guide for the decision ahead.
Separate the boards from the rail and deck connections; do not load-test a suspect structure.
- What changes the cost of a dry-rot repair?
- How to prepare for a wood-rot assessment without disturbing the damage
- A leak was fixed. Is the wood ready to close up?
- More damage appeared after opening: what should a revised repair scope explain?
- After a wood-rot repair: a practical homeowner closeout checklist
- Rotted Window Sill: Repair or Replace?
- Residential and Commercial Water-Damage Repair: Which Trade Handles Each Stage?
- Commercial Interior-Trim Water Damage: Plan Access and Finish Boundaries
- Dry Rot, Water Damage or Moisture Damage? Understanding the Repair Question
- Mold and Damaged Wood: What Must Be Resolved Before Repairs?
- Water Stain or Deteriorated Wood? What Safe Photos Can Show
- Water-Damaged Door Thresholds: Define the Repair Boundary
- Patio-Door Surround Damage: Separate Carpentry from the Door Unit
- Fascia and Soffit Water Damage: Repair Scope After the Water-Source Review
- Lower Siding and Trim Moisture Damage: Where Should the Scope Stop?
- Water Damage Below a Kitchen Sink: Cabinet Base, Floor or Both?
- Ceiling Damage After an Upstairs Leak: What Belongs in the Repair Proposal?
- Deck and Balcony Moisture Damage: Boards Are Not the Whole Assembly
- Crawlspace Moisture and Damaged Wood: Coordinate the Right Specialists
- Dry to the Touch Is Not the Same as Sound Wood
- Drying Equipment and Wood Repair: Two Different Parts of a Water-Damage Project
- Water-Damage Repair Records for Property Owners and Managers
Project examples do not establish your property's condition or a local project address. Confirm coverage, service fit and availability for your address.